Customizable Stickshift Keychain Fidget
Date
2025/06/12
Views
715
Downloads
0
Rating
Format
ZIP
Size
19.9 MB
Version
N/A
Author
3DComBo
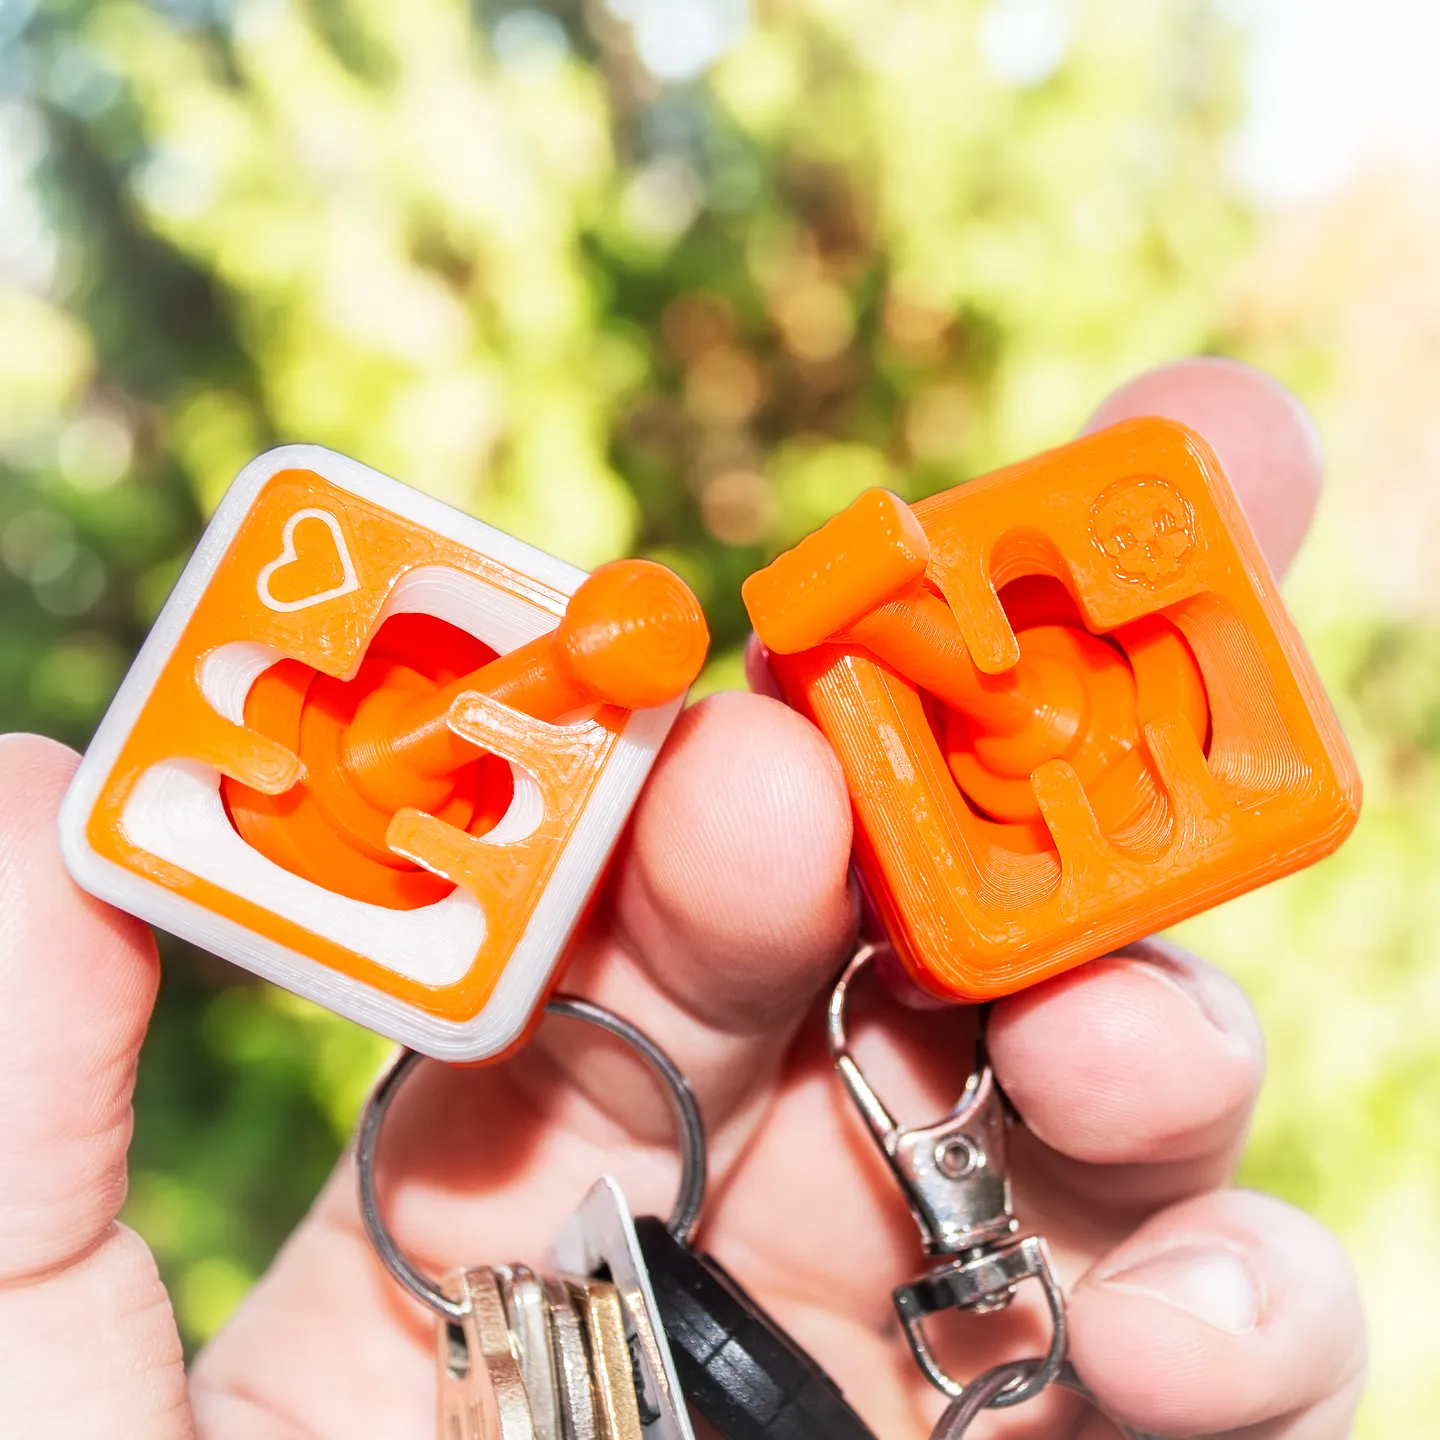
Customizable Stickshift Keychain Fidget (Gyroscopic and Magnetic, .blend included)
Introductions Customizable Stickshift Keychain Fidget
This is a fidget that you can put on your key chain to add some personality, or keep as a standalone toy. It can be easily customized through your choice of the different provided STLs, or even further by using the provided blend file. Video demo (with sound) can be found here. You can assemble this model on it's own, and it's decently satisfying to play with like that, I think. But, in order to get the most out of it, the model requires some glue (preferably a thick, gap filling kind, like epoxy or gorilla glue). It also requires some small magnets. I used 5x3mm magnets, but I have provided files for 3x2 and 6x3 sizes as well, and more can be easily added using the provided blend file. (also, feel free to let me know if you'd like me to add files for another size!). It might be possible to make these parts work with a friction-fit, but it worries me to have two attracting magnets permanently suspended half a millimeter away from each other, without something holding them in place firmly, so I decided to just use glue in hopes the fidgets can last a long time. This model was inspired partially by this model by Michal Fanta, (though it does not reuse any part of that model). Go check that model out if you'd prefer something that does not use glue or magnets. The motion of the stick is very smooth, and it snaps quickly into each position in the gear shift. The ‘gyroscope’ mechanism lets the stick pivot really smoothly, without any lubrication, and prevents it from rotating in place. The magnets make it so that the stick always wants to jump into whatever the nearest position is. You can kind of just flick it, and it will instantly pop over to the position you flicked it towards. Parts Needed:
- 8 small magnets
- Thick, strong glue
- One base (with your magnet size) (your choice of keychain type)
- One lid (your choice)
- One gyro (with your magnet size)
- One stick (your choice)
- I have successfully printed every part using my high-speed profile (0.4mm nozzle * 0.2mm height), on my rickety little bedslinger. However, for best results, I recommend these settings:
- for the gyroscope, use a lower layer height in order to get better results on the hinges. A little sagging on the underside is no big deal.
- for the stick, use a lower speed to ensure that it is smooth up and down. You may need to use a brim, but that is something that will depend on your printer. Supervise it if you do not use a brim. I recommend you use at least 3 perimeters.
- for the lid, lower speed for dimensional accuracy along the guiding/slide holes, is ideal. It's also smart to control the speed for small perimeters, and for first layer (if you have a design on your lid, to make sure the small extrusions stick).
- for the base, I do not think it matters.
Post-Printing
Assembly:
I recommend verifying that each part fits together properly before adding glue. You may be able to figure out how this all fits together without a guide, but I'll share some instructions just to make it totally clear: Please let me know if any step of the assembly confused you! I'm happy to update the guide if needed.Additional notes on assembly:
- It's best to avoid getting glue all over the moving parts, but a little bit of spill does not seem to cause problems. As long as you quickly wipe away the excess, and you're not getting glue directly on the pivot points of the gyroscope, it'll probably not cause issues.
- The easiest assembly method involves putting the lid on last, over the stick/grip and gyro piece. Some stick designs can't actually fit through that way, so you must install the lid before installing the stick. I thought about deleting the parts that wouldn't fit through the lid the normal way, but I found that the second installation method isn't so hard either, and so I kept them in. My favorite grip is the 'normal round with ridges' model, and it can be installed before the lid :)
- You can skip the two repelling magnets in the middle if you'd prefer something that moves a little more freely (maybe if you want to use larger magnets, too, though I have not tested). However, I much prefer the feel of it with the center magnets, as they cause the stick to sort of stay aligned to one track at a time, and snap into place more aggressively.
- Technically, you can skip all of the magnets if you just want it to move freely.
- The parts do not have a super strong friction fit, however, they do fit together snug enough to be able to mess around with it. Feel free to print it first and see what you think, before you use up your magnets and spend time fully putting it together.
ustomizing:
I have provided a .blend file with the boolean mods set up for the symbols and for the magnets, along with a simple constraint on the magnets so they change sizes together. You can use this file to quickly make and export new .stl files with different magnet sizes, or for different symbols in the top (for example, any emoji can quickly be inserted into the lid to get a new symbol). There are also some extra things provided, in case you want to make a custom stick/grip for it, or anything like that. You can also use the blank lid along with a negative modifier in your slicer to get a custom symbol or letter in the top.Introductions Model STL
| File Format | ZIP |
|---|---|
| File Size | 19.9 MB |
| Version | N/A |
| Created Date | 2025/06/12 |
| Last Updated | 2025/06/12 |
No comments yet. Be the first to comment!
Please login to comment.